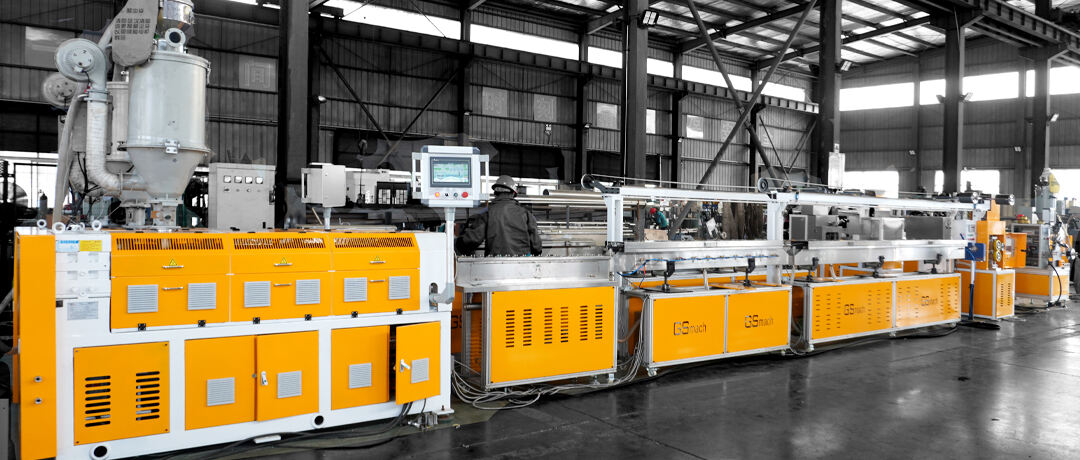
خطوات تصحيح الأخطاء العامة لخط إنتاج ماكينة خيوط الطباعة ثلاثية الأبعاد

الخطوة 1: التحقق قبل البدء
تأكد من استجابة ضبط درجة الحرارة لجميع المناطق الساخنة (منطقة التغذية، منطقة الضغط، منطقة القياس).
تأكد من أن جميع الأدوات تعمل بشكل صحيح، بما في ذلك جهاز ضبط درجة الحرارة، مقياس الضغط ومقياس تيار المحرك.
تحقق من السرعة، الضغط وعدم وجود تسريب في دارة المياه الباردة للتأكد من أنها طبيعية.
تحقق من الاتصالات الكهربائية وتأكد من أن توريد الجهد طبيعي.
نظف الخزان ومنفذ التغذية لإزالة أي شوائب.
تحقق من البراغي والبرميل إذا كانت هناك أي علامات للتلف أو الضرر.
الخطوة 2: تدفئة آلة الإخراج
وفقًا لإجراءات تشغيل برغي التسخين في ماكينة الإخراج، البرميل والقالب. قم بتسخين تدريجي من منطقة التغذية إلى رأس القالب، يجب أن تكون درجة الحرارة الأولية حوالي 10-20°C أقل من درجة حرارة المعالجة المستهدفة. عندما تصل درجة الحرارة إلى النقطة المحددة، يستغرق الأمر حوالي 30-40 دقيقة لتستقر درجة الحرارة في جميع المناطق.
بعد اكتمال مرحلة التسخين الأولية، يتم رفع درجة الحرارة إلى درجة الحرارة العادية للإنتاج. بعد الوصول إلى درجة الحرارة المستهدفة للإنتاج العادي، حافظ على درجة الحرارة لمدة حوالي 10 دقائق. هذه الفترة الزمنية تتيح لجميع مكونات الجهاز الوصول إلى التوازن الحراري، مما يضمن توزيعًا متسقًا لدرجة الحرارة في النظام قبل بدء عملية الإنتاج.
الخطوة 3: تأمين الاتصال
بعد الوصول إلى درجة الحرارة المناسبة للعمل لأجهزة التشكيل، قم بتشديد جميع براغي ومifixات رأس القالب بعناية. باستخدام المفتاح الديناميكي الم-calibrated، تأكد من تشديد مifixات رأس القالب بدقة وبشكل موحد. تحقق من عدم وجود فجوة تمدد حراري بين الأجزاء بسبب التسخين، وتحقق من أن جميع أجزاء القالب محاذاة بشكل صحيح.
出于الأسباب الأمنية، يجب على المشغل الحفاظ على مسافة آمنة من رأس القالب أثناء هذه العملية، مع وضع نفسه جانبيًا وليس مباشرة أمامه. يساعد هذا الاحتياط في منع الإصابات المحتملة الناتجة عن فشل غير متوقع لمسمار أو برغي بسبب الإجهاد الحراري.
الخطوة 4: التشكيل الأولي
في بداية عملية التشكيل، يجب أن تكون سرعة البرغي بطيئة، ثم يتم تسريعها تدريجيًا لمنع الإجهاد الزائد والتلف للأجزاء الآلية.
الخطوة 5: التغذية
لبدء عملية التشكيل بالضغط، يتم إضافة كمية صغيرة من المادة إلى المغذي لضمان تغذية مستمرة. راقب عن كثب المؤشرات الرئيسية مثل العزم، تيار محرك الكهرباء وضغط الذوبان لاكتشاف أي تشوهات مبكرة. ابدأ من القالب، وعندما يدخل المادة جهاز الجر الشبكي، راقب جودة المنتج المبدئي الناتج عن التشكيل بالضغط.
ارفع سرعة التغذية تدريجيًا مع مراقبة دقيقة لمؤشرات أداء النظام حتى يتم تحقيق تدفق تشكيل ضغط مستقر وطبيعي. يساعد هذا الأسلوب في منع حدوث زيادة حمل على النظام ويضمن أن المادة تم تشكيلها بشكل صحيح وتم ضغطها.
الخطوة 6: الجر والتبريد
للتيسير على عملية السحب، يجب finalizing التصميم بحيث يُحتفظ بمسافة معينة بين القالب والموقد. افتح قناة الماء لضمان عدم وصول الماء إلى رأس الموقد لتجنب مشاكل الإخراج. بالنسبة للأشكال المعقدة أو التجويف الصغير، يمكن فتح غطاء القالب. بعد تبلور مادة الإخراج، يتم سحب المادة إلى آلة السحب باستخدام حبل سحب معد مسبقًا.
قم بضبط ماكينة البلاستيك و المسافة بين رأس الموقد، أغلق الغطاء، شغل مضخة الفراغ، وحقق توازنًا بين سرعة الإخراج وسرعة الرسم. راقب الملامح للتأكد من أن الإخراج طبيعي، ثم قم بضبط المسافة إلى القيمة المثالية.
الخطوة 7: ضبط العيوب
إذا لم يتم تشكيل المادة بشكل صحيح عند مدخل القالب، أو تم لصق الرباط الداخلي على سطح الملف الشخصي الداخلي، استخدم أداة ناعمة لإحداث ثقوب صغيرة في المنطقة المصابة. هذا يسمح للثقب الصغير بالتواصل مع الغلاف الجوي، مما يخلق ضغطًا سلبيًا ويساعد الإخراج على الالتصاق بجدار القالب.
الخطوة 8: التعامل مع الازدحام
إذا حدث انسداد جزئي، قم فورًا بنقل طاولة التشكيل إلى الخلف أو زيادة سرعة السحب، أو تنفيذ كلا الحلولين. إذا لم يكن التصحيح فعالاً، يتم تحريك طاولة التشكيل للخلف، وتُقطع المادة على طول قالب التشكيل، ويتم إغلاق المياه والهواء في القالب، وتقليل سرعة السحب، وسحب الملف ببطء. وإذا بقيت بعض المواد داخل القالب، يجب فك القالب وإزالة البواقي بشكل كامل.
الخطوة 9: إجراء الإيقاف
عند التوقف، أضف أولاً مادة التوقف، ثم قم بالطرد وإزالة مادة الإنتاج. بعد ذلك، توقف عن تشغيل الآلة وأزل رأس القالب وهو ساخن لتنظيفه.
تؤكّد هذه الخطوات على التشغيل السلس والصيانة لخط إنتاج ماكينة طرد خيوط الطباعة ثلاثية الأبعاد، وتغطي الجوانب المهمة من الفحص قبل بدء التشغيل حتى التعامل مع الانسدادات وإجراءات الإيقاف.
خاتمة
التحكم في عملية تشغيل خط إنتاج ماكينة خروج خيط الطباعة ثلاثية الأبعاد هو أمر أساسي لضمان إنتاج خيوط عالية الجودة والحفاظ على العمليات الفعالة. الخطوات الموضحة في هذه المقالة توفر للعاملين دليلًا شاملاً يساعدهم على تصحيح الأخطاء وتحسين خط الإخراج بشكل فعال.
أداء هذه الخطوات التصحيحية بانتظام سيعزز الأداء الكلي، وسيقلل من الهدر، ويزيد من إنتاجية تصنيع آلة خيوط الطباعة ثلاثية الأبعاد. مع التطور المستمر لصناعة الطباعة ثلاثية الأبعاد، وإتقان العملية الأساسية واستخدامها لزيادة إنتاج المواد للبقاء تنافسيًا، لا تزال المادة ذات الجودة العالية مهمة جدًا.
احرص على أن هذه الخطوات توفر أساسًا صلبًا، لكن كل خط إنتاج بالتخريز قد يمتلك خصائص فريدة. يجب على المشغلين دائمًا الرجوع إلى إرشادات الصانع المحدد وتعديل هذه الخطوات العامة بما يناسب معداتهم وموادهم للحصول على أفضل النتائج.

